
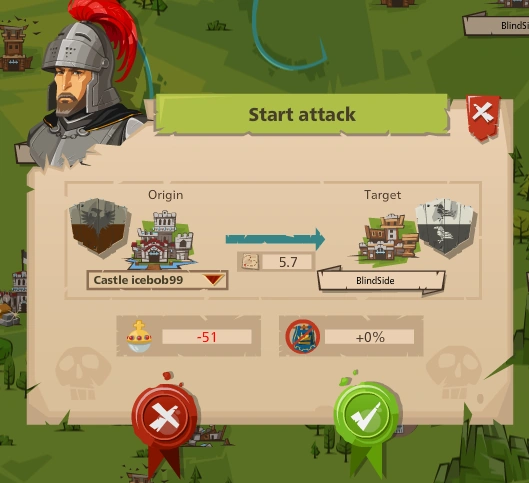
A normal attack screen. Values shown may change
This is a basic guide on attacking. This covers the form of attacking, and what elements there are to one. There are many ways to attack-- for honor, for glory, for loot, etc. I eventually aim to have a page for each one, but the best way to start is here.
The Basic Format[]
If you are attacking, you always will have the screen shown below. The number of soldiers you may send in an attack will vary, depending on the level of the victim, but in essence, this is the basics.
The prerequisite screen to an attack
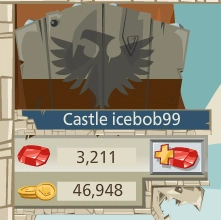
Your attack profile
Prerequisite Screen[]
This is the screen where you may confirm if you want to attack or not. In this picture, there is the location where the troops will originate, my main castle is selected, and there is the location where they will attack, a random castle I chose which I will not attack, but will go through the motions for the sake of this page. It shows the distance to be 5.7, next the map under the blue arrow. If I were to have a successful attack, I would lose 51 honor, and gain no glory, as shown with the ball and blue flag.
Your Profile[]
That's just there to remind you who you are, I guess. Shows you ruby and coin amount, the item of real importance there is the coin amount, as sending an attack costs coins. The ruby value is most likely there as you may buy ruby siege tools directly from the attack screen and also may pay rubies for better horses.
Enemy Profile[]
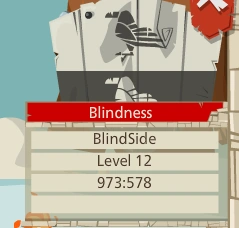

The enemy profile on your attack screen
The picture below is not who I usually attack, I chose a random castle. I would lose 51 honor if I attacked this castle and won, more if I lost. This screen is a bit more relevant as you can see the victim's name, level, coordinate location, and castle name. You can also see the coat of arms but I believe that is there for cosmetic effect.
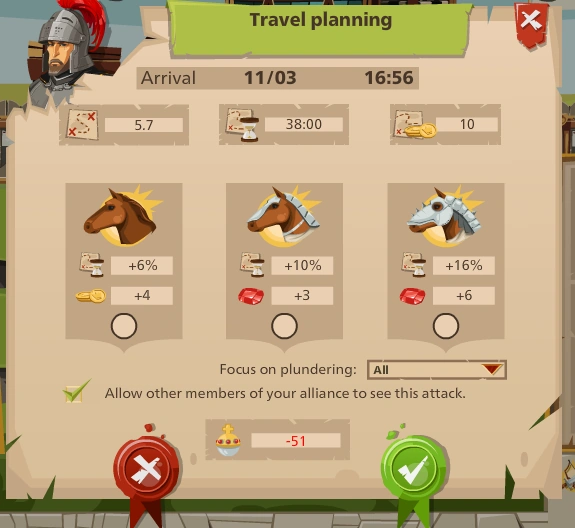
Travel Planning[]
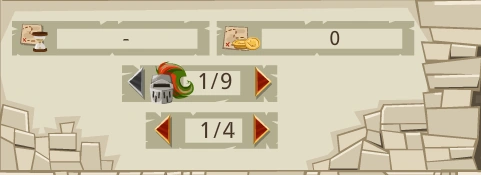

Travel planning for attacking
This is the part of the screen relevant to the travel of your troops. The travel of your troops is the most important part of the attack. The fact is that the battle happens instantaneously, and that the travel time is the real strategy here. When you attack, you most often have a plan, such as honor, or loot. You will also not send an attack unless you are confident you shall win. There is some strategy involved there, but the real thing happens during the travel. The strategy here is based off what the player will most likely do. Unless your troops have an extremely high commander stealth bonus, or the player being attacked has a watchtower, then the attack will usually be detected. It is also possible to influence detection times through the Research Tower. Once the attack is detected, two things must happen in order for your attack to fail: 1. The player must be online, and 2. The player must either move enough troops from other castles or ask for support from their alliance members. The soldiers must arrive on time. There also must be enough soldiers with a high enough defense power to successfully defend.
If these things happen, then your attack is screwed, because you can't change the formation of the marching army once it is sent. It is possible to recall it and resend the attack, but you will not know of the changes to the victim's defense if the victim's defense changes.
With the strategy of travel established, there are specific components to the picture. The value -- next to the map and hourglass is the traveling time, in that picture, I have not selected any soldiers yet, so the time has not been established. The value 0 next to the map and coins is the travel cost. The more soldiers and tools one has, the more the coin cost will be. Coin costs are also influenced by the distance to be traveled. The picture of a helmet and plume along with 1/9 next to it is the commander that is selected by default for the attack. You may change commanders with the arrows on the side. Use a commander with bonuses suited for the type of attack you wish to make. Finally, the 1/4 with the arrows on the side is the number of waves able to be sent. I can send 4 waves of attackers if I wish to do so. I will make a page for this later, but wave strategy is rather simple. You can always just send all your attackers in the first wave, and that is very respectable, and it works, but you may employ different wave strategies, like sending different numbers or types of troops and tools.

Troops available for attack
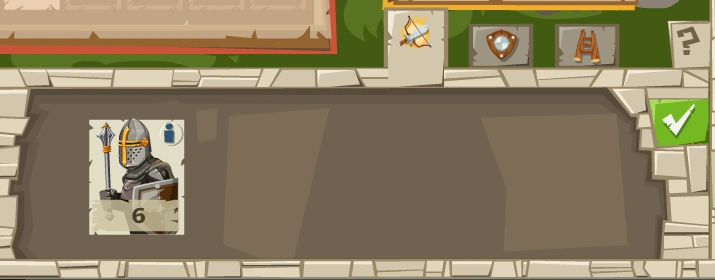
Available Troops[]
Troops you may send are shown here. As I am "attacking" from my main castle, I do not have many attack troops. I will make a page for this later. The picture of the veteran maceman and the number on the lower part of it signify what soldier it is and how many are available. The square in the top with the sword and bow that is slightly larger than the rest means that the soldiers below are meant for attack. The checkmark is the button you click if you have finished attack planning. The question mark brings up game help for attack-- a small blurb. The help content is tutorial-level, only click on it for help if you have forgotten how to attack.
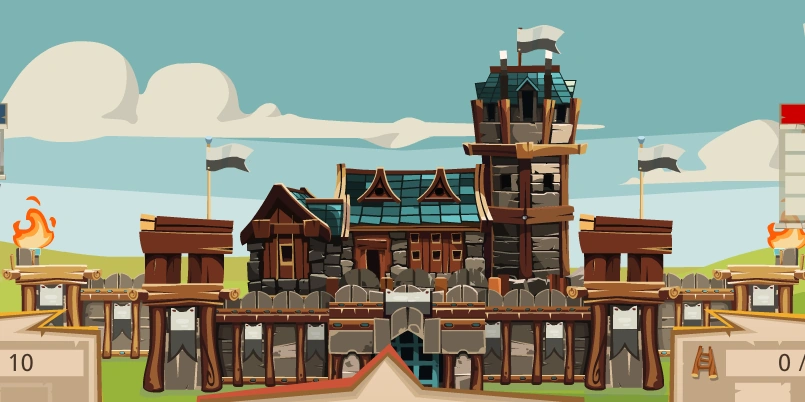
The Enemy's Castle[]
The castle of the victim
The enemy's castle is shown. This has no real use, only to give a graphic appeal and make things a bit more realistic. You may find this of use if you are a visual type, to see where your soldiers will attack. The castle pictured may change depending on the type and level. Examples of this are a castle with level 1 majority of defenses being wooden, level 3 majority of defenses being stone. RBC in this context have low walls and a high tower in place of a keep. They are wooden. I will make a page about this later.
Left Flank Planning[]
The picture shown is what the left flank planning looks like. The ladder at the top with the 0/10 next to it is how many tools you have planned to be sent out of how many you may send.


Left flank planning
A castle of this level may only be attacked with one type of siege tool, as shown by the white square and the shaded square. The shield with crossed swords with 0/14 next to it shows how many soldiers you have planned to send out of how many soldiers you are able to send. As this is a level 12 castle, I may only send 14 soldiers, and only 1 type of soldier. The bow and sword with a 0 signify the attack power, which is currently 0.
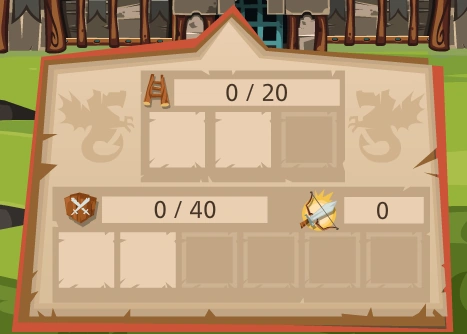
Front Planning[]
The picture shown is of the front planning section. As with before, the ladder and number next to it is the same. At the front, I may send up to 20 siege tools of 2 types. The reason there

Front planning
are two types able to be sent is that you must also negate the gate bonus. There are two available types of soldiers to be sent and 40 in number as the front is more heavily defended than the flanks, and thus needs more soldiers to defeat. The bow and sword with the 0 is the attack power, which is 0 as there are no soldiers to be sent yet.
Right Flank Planning[]
The picture shown is of the right flank planning section. This is identical to the


Right flank planning
left flank planning except for the fact that it is the right flank.
Attack Power and Bonuses[]
Finally, we come to attack power and bonuses. The picture shown is of the front with one veteran maceman set to attack. There is also a battering ram. The value next to the bow and sword has changed to 130. This is because the veteran maceman has a base attack power of 118 and my commander
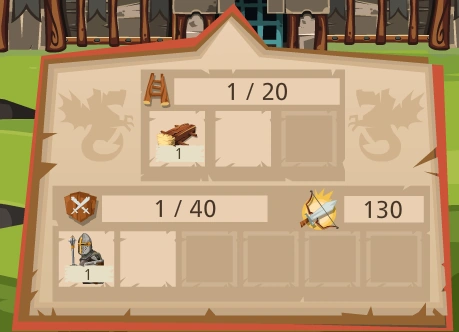

A sample attack
has a +11% melee combat bonus. An interesting note: I could not attack any castle except for a 1+2 RBC. There is a minimum amount of soldiers to be sent, to find this, take the level of the victim and divide it in two. Exempt any remainders. For example, if I was attacking a level 21 player castle, I would have to send a minimum of 10 soldiers. Therefore, I cannot attack this castle with the troops pictured.
Final Travel Planning[]
This is the final screen where you may determine whether you would like to attack or not. It may be reached by
Final travel planning
clicking the green button with the white checkmark in the lower right corner. The new features here are the distance, determined by the map in the top left corner. Also, the horses are new. The plain horse is the one you can hire with coins. The one with the iron stripe is a slightly faster one paid for by rubies. The one with a helmet is the fastest and costs the most rubies. You may also decide which resource you would like to focus on plundering if victory is achieved, and you may determine whether or not your alliance members may see this attack on the movements window.
Miscellaneous[]
If you hold your mouse over the soldier or tool, it will show the combat power of the soldier or the defense reduction of the tool. The battering ram shown has a 10% deduction on the gate, and the maceman has 130 combat power. It used to be the morale of the soldier instead of the combat power, which was derived from the Blade Coast and the Thorn King events. I will make pages for those later, but morale could basically be counted like combat power. Also, a brief clarification: the torches shown on the castle walls are for decoration only. They do not exist in the castle.